Imagination Suites
The Thursday Night Project (TNP) for the NAME Online Houseparty (OLHP) May 2019
Refer to prior post for more details on the OLHP, but for the TNP, keep reading.
I was on the committee so I had a sneak peek at this project before it was available. So once it was available, I knew I wanted to buy this kit.
I was a small amount confused when I opened THE BOX and found the package without instructions, but then I remembered that they would be included on the website. We were supposed to have to wait until Thursday, but somehow we cajoled our way to getting them on Wed. I printed mine out and looked it over.
I'm glad I had reviewed them before I was ready to work on it. We chatted about it in a special chat on Thursday night.
Because the instructions weren't as clear I would prefer, when it said to paint all the basswood pieces black, I didn't. I waited to see where they were going and what was glued. I didn't see the point of painting if I didn't need to. Plus I might want it not painted anyway.
When I do a kit like this I do sand at the connector spots. Try as I might I never trim close enough for my perfectionist nature.
When I paint, I like to do one coat, sand, then a second coat and maybe sand again. I use fine sandpaper or a piece of sanding cloth I was given many years ago. It is very fine.
Others were having the same questions I did. Like which pieces are what? So once I started I took some pics to help. Let's start with those.
Pieces

Middle long piece is the counter top of basswood (there is a veneer countertop as well.
The top pieces in upper right corner: two horizontal and two vertical are the cabinet.

Bottom is the basswood counter top. The narrow long piece is a baseboard for the front. It will go on top of the veneer for the front.
To the right middle are some braces.
Veneer for front of the front counter. I installed mine like is pictured (the deeper portion to the bottom).


Spacers for the wall


Floor
On Facebook a fellow miniaturist said they used the pillow box the TNP accessories were in for her floor. I really liked that idea.I started by cutting it into strips 1/4 inch wide. I used a photo chopper I have. It has 1/4 inch markings so I marked on the left and just moved that mark over each time.


Once the strips are all glued down, I flipped it gold and black side down. I used my knife to trim to the shape of the floor.

It isn't easy to see but I do have holes for the wires.

The placement of the spacers wasn't critical, but I did choose to glue my center spacer towards the front leaving a gap in the back.

Back Counter
This went together very easily. Back view that won't show in my project.

I painted the basswood countertop black. Later realized the veneer went on top of it.
For both veneer counter tops, I left the tops plain. I painted the underside black and the edges gold.
Front Counter
I had some confusion on this. I glued the front veneer to the back counter front. But I realized quickly and it was easy to remove.


So here is the glue I had to sand off and repaint the back counter.

In the above pic, front counter's veneer countertop at the top, basswood countertop in the center, then the front counter assembly with the front counter veneer in place. (See no gap at the bottom.)


When I glue them to the counter, the long side by the 14 will go to the under the counter top. Make sure they all are glued the same way.

Here is the front counter all assembled. Note the narrow baseboard added to the front bottom. I also painted a logo in my 3 squares. More on that with the lights.
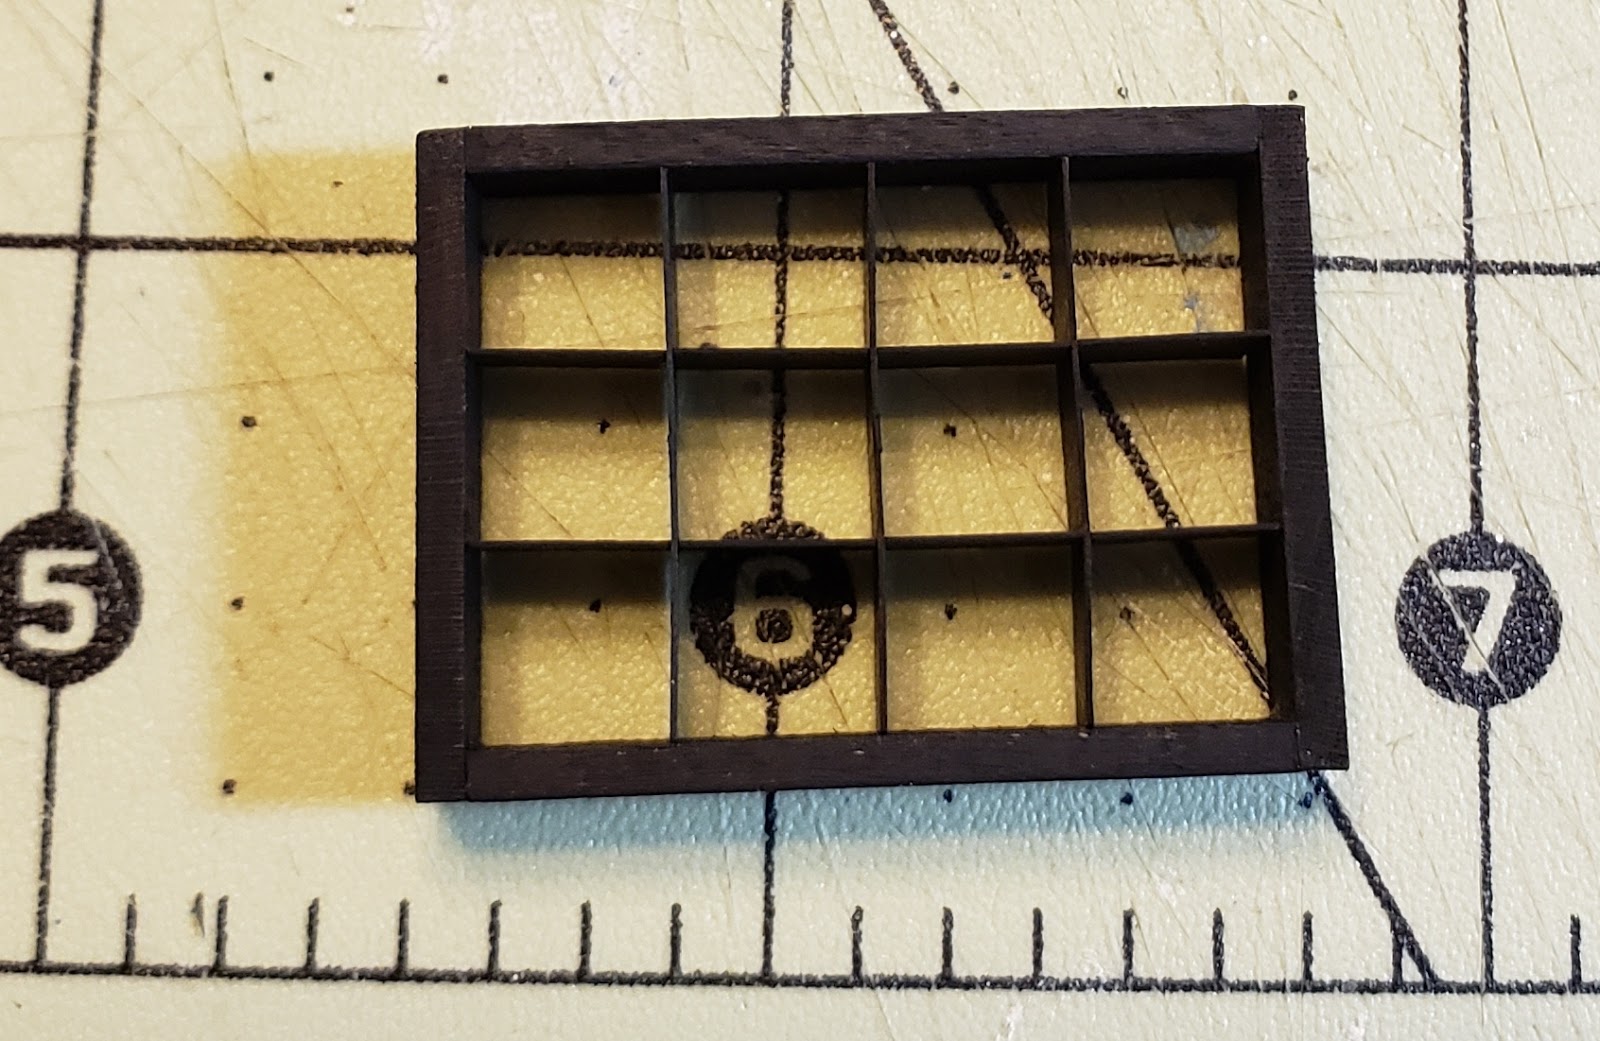
Cabinet
This cabinet is a cubby hole. The instructions said to use the grey tile printie piece, but that confused me so I actually assembled the grid from the black thin card first. It helped me determine whether the horizontal pieces glued inside or outside the the vertical ones. They go inside the vertical pieces.


Yes, there's my handy gluing jig I got from 'Smaller Than Life'. I love it.
I found that the grid was slightly larger than the cabinet pieces. So I trimmed every so slightly on both the horizontal and verticals to avoid them bending. I just kept testing until they fit without bending.
They are not glued in. Just inserted.
For the backing I decided on a gold paper I had. I also added some gold edging.

Wall and Lights
The wall has three pieces plus the spacers.
I cut out the clock and glued to the back of the wall veneer.
I glued the wall veneer to white piece with holes and inserted in between a stack of books to let it dry overnight.
Meanwhile I glued the spacers to the other white wall piece as pictured in the instructions. I also worked on the lights to be ready to put them all together.
When I read thru the instructions at the beginning I was confused about how the lights could be assembled with adding wires to walls beforehand. It is because these LED's are so tiny they fit through the hole in the Light backing.


Only later I decide I needed to. So I cut the outer portion from the black extra and laid it in place to protect the wood as I added the gold trim. Yes, I am a little crazy.
I inserted the LED's in place as suggested. But on the back, I glued paper to hold the wires in place. Maybe unnecessary but I prefer this.


Glued to the floor and I added the clamps just to be sure the floor didn't curl at the ends. Wires were pulled snuggly to go under the floor and the one set of wires was pulled around the front of the center spacers so both my sets of wires were on the same side (right side when facing the back).
The light covers were added. I had pretested putting the light covers over the pico size LED's and they went on fine. I did mark the back to make sure I was at the same height before gluing them on.
I soldered my wires and made sure that the battery holder would go in to the left when facing the back.
Next I added the black around the base. It wasn't long enough to go around the entire base. I was a little disappointed at that, although I understand why. The idea was to leave the opening for the battery.
I glued it around flush to the bottom edge and then trimmed with scissors against the flooring.
I added the narrow black piece against the wall edge. But I did not trim against the wall. I liked the 'shelf' like look.
Then I painted the name on the front. Added the gold along all the black edges.

Battery door and push button

The push button fits against the extra spacer piece I added. I did add another thin piece at the top in the hole to further help hold it in place (this was also from scraps and just to keep the button to the bottom). It isn't tight. The button now slides up against the right side cut out.
The black strip fit around with extra 1/4 inch on the left and half of the right side. I did trim it to be same height as the base.
I added the gold and black piece over the black just to have the same look on both sides of the back. I could have used black instead of the gold and black.
On the left, the gold and black piece is glued to the flap of black, then a foam core piece was cut to fit between the floor and the bottom and a gap for the wire going into the push button.

I used a regular size hole punch. Cut the gold and black piece in half right at the spot. Although in gluing I was a little off.
I've since painted the button gold using a paint marker.
I may yet add something to the back over the white. Probably something about this being the TNP.
Trolley
The trolley instructions were great.
 First, I love these wheels. Laser cutting is great. Just wasn't two sided.
I only made a few tweaks.

I only made a few tweaks.


I painted mine all gold except the base and the top circles.


Accessories
There were several accessories provided in the gold and black box.
I only used 3 of the keys (I painted the keys gold and the tag black, added the gold edging and IS logo), not the vases, but I did use the bell, book and the telephone.

I also assembled some of the souvenirs to go here as well.
I made my own sign and notes. That one box has so many notes for the committee who is plumb tired (haven't even checked their mailbox yet) after this great houseparty. For me, they represent all the sweet notes that MiniB and I have been getting. You are welcome!

RaggedySue - let me try the bell.
SarahB - I love the old phone.
MiniB - this trolley is super neat.
No comments:
Post a Comment