Monday, March 29, 2021

New Website Launched

 With closure of Picturetrail I decided to go for it and make my own website again. 

www.mini-smallpackages.com

With this new website I will be blogging on that site as well so this will be the last post here.


I have pages for all my projects except a few still in process. This includes both photos and the how-to's (including many previously published here). Please check it out.

Happy Miniaturing!

Preble

Sunday, September 6, 2020

Lady Bug Band in a Scrubby

 My First Scrubby Holder Project

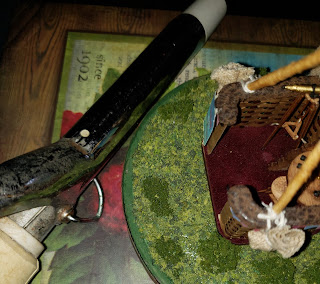
Browsing ebay I found a lady bug scrubby holder for a reasonable price (less than $10). Most ones I see aren't ones I want for a project, but this one was for some adorable lady bug band. I got the band via a mini friend that passed away. A small group of us from our club were visiting and she offered for us to take some items. She knew it wouldn't be long for her. I will always treasure this band in her memory. They are made with a combo of wood and metal.

When the scrubby arrived I removed the scrubby from inside. This was either too big or the holder too small. Either way, it didn't matter to me for what I had plans for the holder. I then washed it to remove anything on the surface.

The band were on wood disks and I knew that is what held them up. I decided to only use paint and landscaping product to blend them together. Another miniaturist used plaster of paris, I have used paper mache in other projects, but for this, I felt I couldn't do that and keep the disks. I didn't want to figure out getting them to stand on their own. Or try to embed the disks into another product.

I decided roughly where to put the band and took a photo.


I painted the bottom green. I matched this green to the painted disks. In hindsight I wish I had painted the bottom brown like dirt and including the disks. Then I painted the sides and top blue. I added a few clouds as well.

Next was adding some of the green landscaping. I wanted to fill in the back and as far as where the disks would go. I added three colors of green. Two as denser foam for shrubs and then a looser one for grass. I had recently purchased a tweezer set that I didn't read the details very well. In that set was several larger 7 inch pairs. I saved them for just such a project.
The loose foam I would normally add glue, sprinkle on, pat down and let dry. Then shake the excess. Then use scissors to trim away any that stuck up too much. Because I was working with the disks and I wanted to blend the bottom with the disks, I went ahead and applied the loose foam behind, then to the disks one by one, glued them in place. I would sort of pat down the foam. Once I had to push some glue and foam out of the way as I had done too much forward. But it was still wet so easy to move. Then with all three band members in place, I added the rest to the front of them. About then was when I remembered my scissor trimming technique. I went ahead to continue the rest of the process. 
There was very little excess to shake off later, but I did have some spots to fill in. This is where the brown would be good. However I filled in the spots to make sure no shiny glue. A mix might have worked too. My issue with that is if I mix too much, then I have to throw away. Silly because it probably isn't that much cost wise (50 cents at the most), but I still have that 'don't waste anything' mentality. When I shake off the excess, I always do so over a paper plate so I can then fold the plate to funnel into the bag to save it. Can't do that with the mix unless just make a bag of mix. Now there is an idea. 
Shh, the show is about to start....

Saturday, August 22, 2020

Egg Basket Scenes

 Earlier this month, I visited my local thrift stores. I found these two egg baskets. I knew that I wanted to put something miniature in them.

This week, I started by filling the basket to bring the level up to just below the edge. To do this I used both builder's foam and foam core board. This was just from scraps I had saved.

I added glue and remembered to take a photo real quick. Notice the shaped pink foam and then just pieces for filler.

To cut the shape of the pink foam, I started with just the width that would fit into the basket and rest on top of the basket base.

Then I used my craft knife to cut the oval shape and carve away so it would fit down into the basket.

There are some gaps but I believe I can cover those with the landscaping.

Landscaping Yellow Basket

For the landscaping, I used two different types of product. The yellow basket I added a piece of grass paper. It was easy to cut and fit into place. I did however cut too much in spots so I added strips from the same paper to those areas. I was really careful to cut strip that had the 'grass' but wasn't too wide. I didn't need to do much fiddling with the 'grass' but did so to help blend.

Also for the yellow basket, I cut off some larger flowers and wrapped the stems together with tissue paper. I then painted the tissue paper to cover. 

Yellow Basket Banner

The kitties were ready to go but I wanted to add the banners. I looked online for images of banners. Once I found one I liked, I added it to Word and resized. I printed two so I had a choice. I had measured the distance between arms so I used that as a guide on sizing. 

Here I have started to cut the one I will be using. I was really careful to not cut to the all the way through the banner so it would be easier to handle. I only cut too far in one spot.

After it both sections were all cut out, I added thread to the back so it would be hanging from their paws.

Pink Basket Landscaping

For the pink basket landscaping, I used brown ballast for the path. The green 'grass' is foam. Then I added different foam for the shrubs. All of these are likely found via a train store or similar resource besides a miniature shop.

There were a couple of spots that I had to add the landscape product a second time due to gap against the egg. However, this was an easier fix than the fiddling with the grass cloth fix.

The bunnies were then glued in place. Once dry I glued the umbrella (from a swap) to the smaller girl bunny using super glue. These bunnies were purchased from a former etsy seller in Australia. 


Spring is always happening at my house.

Happy miniaturing!

Preble

Saturday, June 27, 2020

Hot Air Balloon from OLHP

Up, Up and Away
In 2019 NAME held their second OLHP-  Online House Party. The theme was Around the World in 8 Days. The centerpieces were Hot Air Balloons.
Each registered person had a chance to win a finished centerpiece. They sold them as kits and there were some available in the Auction. I won one of the auctions, so mine was finished by Debbie Colombo. But I wanted to cover it.


Base

To start I had a used dome that my mother gave me. She is a thrift store shopper and she has found me several of these. But it didn't have a base. So I made one using pink 1/2 inch thick builders foam.
To cut it out, I drew around the base of the dome with a pencil. Later I realize I should have added an extra 1/8 inch or so. Also could have used my compass at this point. Then I used my craft knife to cut it out. I like to use one of those snapblade knives as they can be extended to cut thicker stuff like this foam.

When I cut out a round shape, I like to use a up down motion, more than a  slicing/drawing motion. For this thickness, I will go around several times before I cut through. I don't want to cut through to start because the foam is more likely to tear/break. I can get a smoother cut by making several repeat cuts.
I will sometimes cut the area away from the larger piece first. However when I do this, I do not worry about cutting next to my final cut.
Next I gently but firmly pressed against the cut base with the dome to give me a line where I would want to cut as an inside. Later I will realize this was unnecessary. Instead I could just cut 1/16th inch inside the outer cut. To help with this cut, I used a compass to measure and mark. I have one that you can put a blade in, but for this task the blade wasn't needed since it won't cut deep enough. 
This time when I cut with my craft knife along the circle, I tried to only go about 1/8th inch into the foam. 

Next I cut from the side of the base about 1/8th down to cut away an inset/edge.


Hill- elevation

I wanted to elevate the balloon to fill the dome. I tested various thicknesses of foam and foamcore board. I settled on one layer of foamcore board added to the pink foam. I had some scrap pieces and so I only needed to cut away at the corners. This will be covered by Celluclay shortly.


Battery holder placement

My next consideration was the battery. This piece already had light and battery pack. I wanted to be able to turn the light on from outside the dome. In prior projects, I haven't always considered this aspect to be important, so I am trying to learn from those decisions.
I laid the battery pack on the foam in the position I wanted, then drew around it and the wires. Then I cut along the lines with my craft knife about 1/8th to 1/4th inch down. Then I used a pointed and curved sculpting tool I have to cut away the foam in the channel for the wires. For the battery pack area, I used my break off type craft knife with the blade fully extended and turned flat to cut away the foam.
The next thing I want to do is secure the foamcore to the pink foam base.
I do this using toothpicks. I use a sharp pointed (ice pick like) tool to poke a hole in the foam core. I insert the toothpick to mark the pink foam. Then use the tool to make the hole in the pink foam. I do this because to force the toothpick through the pink foam will cause the foam to break and a bigger hole may happen.
I use some cutters to trim the toothpicks, but I could have used my craft knife instead. 

This is how the wires and battery are positioned that will be sandwiched between the pink foam and foamcore board.

The channel for my wires may seem big, but I knew that I would need some room for the wires to move. To change the battery, I will need to be able to slide this battery pack out. This battery pack screws together.
The two layers together look like this


Hill - shaping

To further enhance the hill, I added Celluclay. In hindsight, I should have done this separate from the pink foam and before I did the toothpicks. This could be done on plastic wrap or other surface. 
The Celluclay is a wet application and caused the foam core board to warp. I tried to keep the water down to as little as possible but in order to mix, it must have some water. I like to add the Celluclay to a small cup and add a little water. I stir with my hand over the mouth so the finer particles don't go airborne as much. I keep adding small amounts of water. But if can just squish wet against dry it may be enough without adding more water. Ultimately I want it moist with no dry pockets.
I use my finger to smooth it out and push it around. I tried to just add a thin layer or fill in gaps. I like Celluclay for a dirt/ground base because it is uneven but not overly so, unless I make it that way. It is also super lightweight.
It will dry to much lighter grey.
It dried and the foamcore separated from the pink foam, but even the pink foam warped some.

Hill - making it green

I then painted the base all but the sides a medium foliage green.
After the green paint dried, I then glued the pink foam and now green foamcore all together. Since it had come apart, I also had to put the wiring back in place. So again, I wish I had not inserted the toothpicks yet. Or I could have glued it together before applying the Celluclay. But even this could have still warped even more.
To attempt to glue and remove the warping, I used clamps on the two pieces of the base. I had to set in a box to keep it from tilting. The balloon was attached by the wire so it just rested on top while clamped.

The next step was to add the landscaping which I forgot to take pictures of.  I used two types - a loose and fine foam for the 'grass' and a darker medium foam for the 'shrub'. I just glue randomly to my taste for the latter.

Once the landscaping was dry, I glued the basket on to the base.

Base Trim - wood veneer

To cover the pink foam sides and help the glass dome to stay in place, I like to use wood veneer. I have a package from my local hardware store in Red Oak, but I can stain other colors or paint it.
I like using this product because it is easy to cut and I can apply it to the pink foam using heat. For a previous project, I have used an iron like for clothes. But it is so much bigger than needed. I have resorted to using a curling iron instead. 

I highly recommend cutting the wood veneer first. I did this wrapping around base with dome not just the base. Because I was going to do a cut out for the battery which has a switch on it, I choose to have the seam an inch or more away from that cut out.

I then marked and cut my cut out for the battery switch. I also sanded the corners although not necessary. I could have just cut two pieces: one for the battery width and other for the rest of the base. The battery piece would then be trimmed to fit below the battery. This style would have two seams.

Now I am ready to apply the wood veneer to the pink foam base. I have my curling iron on the highest setting. This one doesn't get that hot so I had to go over and over a small spot until it was sticking. I just continued this process until I was to the end. The battery/wiring should be removed during this to avoid heating the wires. But since the wires are attached, they just need moved to one side or the other.

The heat will activate the glue on the back of the veneer and it sticks nicely to the foam. If the foam dents, then the heat is too hot. Do not apply for as long or change settings on the iron.

My mistake was getting this wood veneer too tight to the foam. I had forgotten that I had to allow some room for the dome since my base was a tad smaller than I needed. I ended up with an overlap and rather than try and think why that might be, I just trimmed it. When I put my dome on later, I realized what I had done. Facepalm.

My next step should have been cleaning up the excess glue but instead I stained. It was ok that I did, but more logical to do the glue next.
To remove the excess glue on the veneer I used the curling iron again. This time just rotating the base against the iron versus the iron against the base as before.
In this pic, I am demonstrating 'how I did it', but not 'when I did it' as couple more steps below have happened.

Removing the excess glue required I heat a section then use my craft knife to scrape the inside of the veneer that was above the pink foam. It was a bit awkward since I had glued the balloon in place. In prior scenes I have trimmed the excess above the pink foam away. But for this I wanted that edge for the dome.

The dome did not fit with the glue in place. It was really tight even with the glue gone.
I let it sit for a bit and then it occurred to me to check some other domes I had without a base. Thankfully, one of the other domes was slightly smaller.

The next steps were to paint the base green between the veneer and the grass. Then to stain the wood veneer my selected color.

I stained, then painted, then removed the glue and so had to paint again. So glue, then paint, then stain would have been better.

Base - Staining the wood veneer

As mentioned above the wood veneer could be painted or stained, or natural even. I wanted the stain to be close to the color of the basket. I cut a piece of veneer and applied stain/color from all my pens and markers. Then I glued (using the curling iron) the wood to a piece of card and applied the stain/color to the card as well.
I will add more wood for new ones and for that last dark color.
I think I should add 'Red Oak' at the top of the wood piece, since not all veneer is. 

I choose the Walnut marker as it was the closest to the basket.


Here are some finished pictures of this project.


The balloon and basket kit was assembled by Debbie Colombo. I just added dome and made a base to keep it covered.


with light on


Finally, here is a video to see it all together.


Friday, May 8, 2020

Around the World shop with OLHP Swaps

Around the World in 8 Days was the theme of the NAME Online House Party OLHP in May of 2019. One of the items I purchased in the salesroom was a 'Putabout' shop kit from Cindy McDaniel.
The shop is a basic roombox plus this nice shop front.
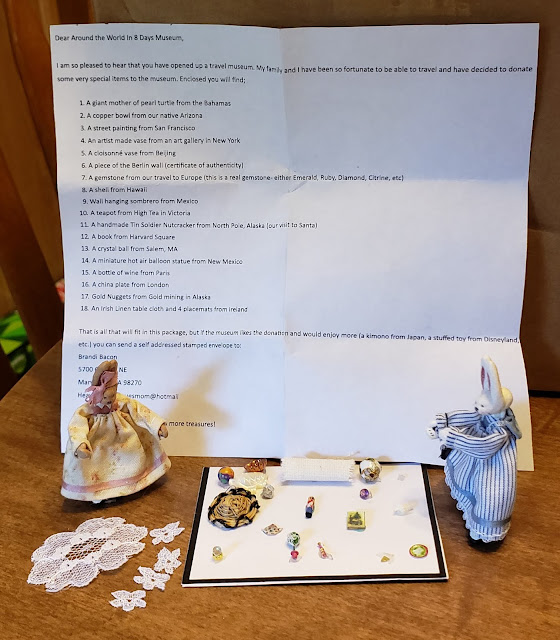
I was also a winner of a set of OLHP swaps in all three scales.
These are the quarter inch scale ones
After looking at the swaps and thinking more about the shop, I decided to showcase them as a shop and museum. Thanks Brandi for the idea.

For wallpaper inside, I used packaging from a white pillow style box (top right of pic below) that some Committee gifts came in. I cut it apart and I had to make those curves fit together. It was the texture that I liked.
The pastel striped one I will use later. The gold one was used in my TNP.

For the floor, I used the green paper bag the swaps came in. I choose to glue that to a piece of card before gluing into the shop.
The front I painted white. I added thin trim to the inside of all the windows. The trim was painted white before gluing in place.

I did all this fun work last year after the OLHP, but then it was back to real work (I took vacation to enjoy the OLHP) and I decided to go back to working on the Petite Chateau.


More recently, I felt the calling to work on the ATW shop again. It was a zoom meeting of fellow miniaturists. It was a way to make up for the mini events that were cancelled due to Stay At Home orders of 2020.
I started back by cutting the plastic for the windows and began adding same trim to the outside of each window.

Furniture
To display the many items I received as swaps, I needed tables and shelves. I had purchased some kits at the OLHP: Eiffel tower tables from BJ Minis and also a map dresser and map mirror from Debbie Young. The black and wood ones are by ANI. I got them as part of an auction group.

Since I had decided that my shop might be a museum, so I wanted it to be a little fancy. My vision of this was to paint the kits black with stained pieces.
It was fun to work on these as I was in a zoom meeting as well as on my own.

Door - the kit came with a door, but I decided to use a fancy door instead. I painted it black. Then to fill in the windows I tried to use DecoArt Triple Thick liquid for the smaller ones. I tried doing this by laying it on a plastic bag, but I didn't glue or tape it down in some fashion so it soon began to slip. Also the Triple thick wants to level, so it wanted to run under rather than try to fill the opening. I let that dry and then used my craft knife to carefully remove it. It does peel away well, but I had to touch up the black paint. The Triple Thick is a good option for when adding 'glass' to a flat surface. It worked fine when I used it in my OLHP suitcase souvenir.
Next I went back to my trusty favorite simple white glue - the thin kind. This technique is done by applying with a toothpick to the interior window frame and drawing it together to form a film.

This worked really well for the smaller ones. However for the larger center window opening it did not. My solution was to cut a piece of plastic bag so I could tape it to the door. Then I used the thin white glue to form a film across the window. I left that to dry, then removed the plastic. This peeled away easily.
There is some cloudiness to the windows due to how thick the glue ended up, but I decided I was satisfied with it. It isn't much on the smaller ones but the larger one it did. I think I could have controlled that better.

One other issue I had was with the door frame. The bar along the bottom broke and I had to cut a new one.

Magnets
I had read an article about using magnets to connect wiring. I decided for this shop I wanted to try to use magnets to hold the shop front in place. So I ordered some tiny magnets. It was only after they arrived that I realized how tiny they were at 1/16 x 1/32 of inch.  These were perfect for this project, at least for what I wanted.
Here's 100 of them

To use them, I used my dremel to drill a hole to fit the magnet. I drilled down to make them flush. I had to do this on both the edges of the building
and also on the back of the front.
Both pics are sideways

Aligning these holes was important.
I did have to fiddle with it because I hadn't drilled some holes as deep as I needed. This resulted in the magnet not being flush with the edge.
Then I drilled too deep. To resolve that I cut a sliver of wood to fit into the hole. The magnets were glued in place with super glue. This glue also helped to deal with the wood I used as a filler for depth. For the hole I made too deep, I had to re-drill so get the desired depth. I know I should have used tape wrapped around the bit to mark how far in to drill, but I did not.
When working with the magnets, I intentionally did not use typical tools like metal tweezers. To separate them, I used a plastic card with a very thin edge to 'slice' them apart. As I moved the card away, I had to make sure that they were kept apart as they have a tendency to fly together. I did use a metal tool to place the magnet and then slide away with my finger helping it to not pop back out and with the metal tool. I did this only because my fingers were too fiddly with holding them.
One other thing I did was to mark a side on each magnet with a permanent marker. As long as I didn't rub them against each other, it didn't remove it. This was needed to assure that I glued them correctly. They will repel each other if 2 + or 2 - are together . When I glued them in place I wanted to be sure they wouldn't get glued together, so I only glued one at a time.

Awning
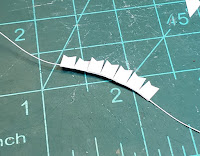
In the swaps was two llamas and a senorita. I wanted to include them in my shop, but didn't want them inside. I decided that I could use another pillow box that committee gifts came in to make an awning for the side of my shop. I used my scallop decorative scissors and just cut to fit my needs. I cut flaps to give structure. To angle it, I did have to pull apart and re-cut at the non-scalloped side.


Once all was assembled it was time to put everything together. Everything is glued in place including the llamas.
I hand painted the lettering.
Senorita and Llamas from Sue Spangler - included was some neat wallpaper, so I cut one llama out and glued to the wall behind them.
Doll with bag and accessories from Jackie Williams
rusty giraffe purchased from BJ Minis

Sphinx from Sharon Johnson, Egyptian head from Alician Pearce
Wood map from ??? (I lost the tag)
Map dresser and mirror kit by Debbie Young, 
Hooka, camera and book (on dresser) from Linda J Clark
Kokopelli kit by Janet Smith, 
Masks from Alician Pearce
Items in bookcase from Brandi Bacon
Globes from Debra Moorehead and Carin Shapiro
Gold Buddha and red phone box were 3D committee gifts, 
Eiffel tower from Jennifer Crowe
Hot air balloon, Bobbie, cooper dish from Brandi Bacon, 
Steine from Laura Nelson
Fish from Lesia Lennex, 
Hat and turtle from Brandi Bacon

This was a fun project. A simple kit that helped me find a permanent home for the wonderful swaps that I won.

Happy miniaturing!
Preble