Showing posts with label silk ribbon. Show all posts

Saturday, September 24, 2016

In the box - Raggedy garden corner

A few months ago, I challenged Little Enough News members to think inside the box. I wasn't able to work on one myself although I bought a box to use. I was planning to use the lid as an extension of the box for a extra space and at the time wanted to do  Thanksgiving or Autumn.
Last week I bought two raggedy dolls on ebay for a song. I was so excited that I got such a great deal.  I looked at these dolls and thought what could I do for them to get a home. But I put them down and had to come back.
Later I was moving some items around because I had been packing and shipping stuff for my garage sale. I spied the box I bought for the In the Box challenge and I thought, yes. This is what they can go in. 
I had bought the frame at some point and had in mind to build a box to fit, but this box fit.
Here's my initial items to use:
I didn't take any in between pics, so I will just outline the steps.
Box
The box had a lid and I decided it wasn't needed for this frame. I painted the outside an off white. Inside was light blue on all walls except the floor. The floor was painted brown.
This part was easy.
Later I added the clouds to the ceiling and along the top of the walls.
I applied glue to the floor and sprinkled on the ground cover. Patted it into the glue and let dry. Shake it off to remove excess.
Then I added some shrubbery, keeping in mind where the bench was going to go.
The bench was repainted to fix some issues I felt with the pink. I did consider some greens, black or brown. I decided to repaint off white and just fix the pink color. For once I did not paint the entire thing. I wanted this to be quick as possible, so I didn't repaint the back (that doesn't show) or the bench. 

Frame
The frame took the longest to do. I painted three coats of off white. Getting in the openings I intentionally used a cheaper brush so to not ruin one by pushing into those openings. I only painted the back of it once to allow for warping. I think the cutouts helped with this as I had very little issue with that. I sanded between each coat.
As I painted it I wanted to do something to use the red and blue colors of the dolls. One idea I considered but discarded was to add glue or puff paint to add dimensional details. Another idea was to stain over the paint to give an antiqued look. Also this was discarded. It was only after the inside of the box was done that I came up with another idea on how to incorporate the red and blue.
I pulled from my stash some red papers. I decided I wanted to use some red tissue paper although I considered some shiny paper and also some glitter paper. I considered to cover all the openings with the red, but then I thought what if I added blue in some openings. I didn't have any blue tissue paper so I checked my ribbon stash.
In hindsight the all red for the openings would have been much easier, but I am very satisfied with the combo of red and blue. There were several places that I had to use the ribbon side by side to cover the opening since the ribbon I had wasn't wide enough.
One idea for the back, would have been to have a second frame to cover the back to cover the mess. But I didn't have one of those and I like that I can see light through the covered openings so I will leave it a mess in the back.

Base
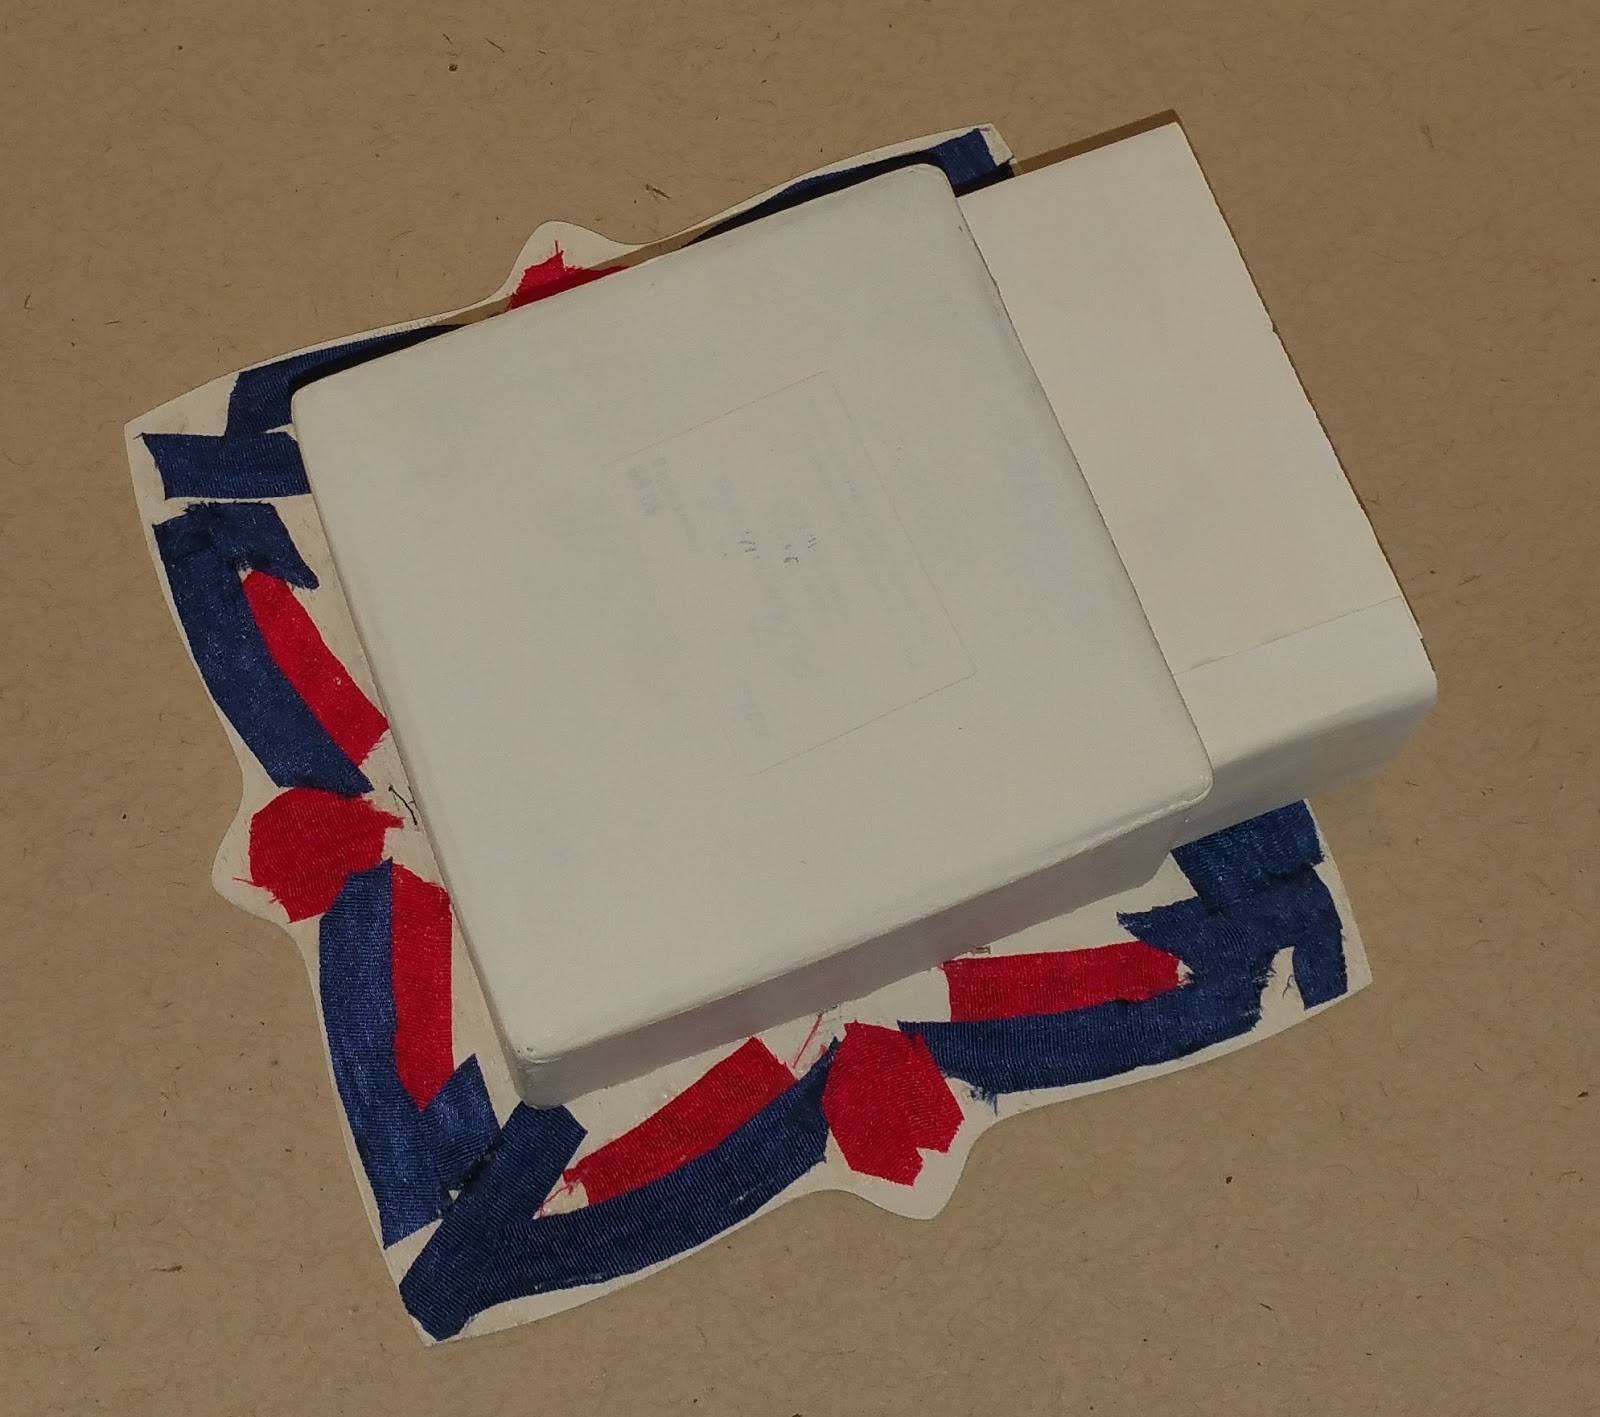
I knew the frame needed to have the box lifted since the frame couldn't support the front. I noticed the smaller box on my desk and it was the right size height wise, but not big enough to support the box and frame. I had more of the smaller box, so I used two. I then ended up covering these two boxes with some thin card that I painted to match.

Now for the finished piece
From start to finish it took about 4 hours. 

Ideas to make it quicker:
use a printed background in the box
use a single color for the opening or none
stain the frame (then the edges in the openings don't have to be dealt with)
leave the box outside unpainted
not repaint the bench

Monday, July 11, 2016

Don't Look Back - scene in a cup

Some might assume that a tea cup project needs to be a tea time scene, but I am happy to prove that is a totally unnecessary assumption. This project was inspired by the cup and saucer.  I bought this recently at a yard sale along with a few other related items. I wanted them mostly as I thought they would work with my other items with this style. I didn’t necessarily purchase them for making a mini in. 
I set up a display in my living room on a shelf I have just for this purpose. I rotate the displays here as I feel like it which is usually at least with the seasons, but sometimes more often. As I was quite busy, I didn’t actually finish this display. I kept adding things and then didn’t get back to finishing it. But I walk by in every day as it is near the door to my bedroom.  
Several times as I walked by I pictured something on top of the cup. This wasn’t something I already had. Instead it was something that would need to be added. I have various prints from this same artist and one in particular came to mind. I went to that print and said, yes, I believe it could work.

Fill the cup

There are a number of ways to fill the cup.  In all likelihood, I might could have just glued a heavy paper/card to the rim of the cup and that might be ok. My concern is that over time the paper could sag. Also I was planning to stick things in and knowing that, I thought it best to have foam at the top. I use builders foam often, so this was my go to solution.
I cut a circle first and then smaller blocks that I would stack underneath. I did have to angle the side of the circle as I wanted it to be level with the rim. I also wanted the foam rim to match closely to the cup rim, so I used my craft knife to cut away a little at time until I was happy.  There was a gap in a couple of places but figured I could cover them with the landscaping product.
I did have to add in the triangles (at bottom of pic) to force the foam to stay in place. I wanted this as pressure versus glue as I was gluing to ceramic.


Landscaping basics
I drew a rough outline of the path and then painted brown and green.  I adjusted this until I was pleased with the shape.

Next I applied glue to the path and sprinkled on fine brown ballast from my stash. I patted this in place and let dry a while before shaking the excess over a paper plate.  The excess was then returned to the bag. I allowed the brown to dry before I moved to the green.
Next was the green.  I used two different products. One was a very fine medium green foam. The other a mix of lighter green and yellow. I mixed these two together until I was pleased with the result. Then I added glue to one section of green at a time, repeating the sprinkle, pat and shake process. 

All these products are stored in plastic zip bags. I prefer the zip bags over a non-zip bag as tape just didn’t work for me. I use a bead scoop for getting a little or lot of product from the bag, instead of just shaking out of the bag. It also helps to keep some of the product out of the zip area. 
Road sign
The pole is a bamboo skewer painted white and cut longer than I needed. The extra length was to stick in the foam. I did use a needle tool to poke a hole in the foam rather than force the pole. The sign itself is heavy card. I used my craft knife on the end of the skewer to open a slot for the sign to slide into. Sign glued in place and skewer glued back together best I could. The paint helped hide any gaps. I hand-lettered the sign with an extra fine point pen.

Mushrooms
I knew I had a bunch of thicker paper holes in my stash. I pulled out this bag and decided they would work for the largest ones. I did use a my swirl punch for the smaller ones also using some thicker paper. I used a double ball stylus and paint brush end plus a foam pad to shape the mushroom caps. 

The stems are round wood toothpicks painted white. I was able to get 4 stems per toothpick as I wanted the narrow pointed part for most of them. The caps and stems were glued together and then I painted the caps red. They were then glued to the scene. To help with placement, I did punch a hole in the landscaped foam but mostly in the landscaped grassy part, as a deeper hole wasn’t needed. After the mushrooms were all in place I went back with dots of white on the red.


Morning glories
The vine is made from strips cut from the edge of copy paper and then painted. These super narrow strips tend to curl on their own but I did some strategic gluing to get it in place. To get length, I just glued them one to the other. The curls made same way but added as I was working the flowers and leaves.

The flowers are more hole punches from thin paper. I cut a slit in them so that I could make a cone shape. To shape them, I rolled them against my finger with my needle tool. Then glued them and then painted. 

The leaves were some punches that I purchased with a group. 

This group went together to buy a bunch of different colors and shapes from dealer that offers both punches and punched petals. One individual did the ordering and then separated them into smaller amounts to send to or each group member. I glued the punches to the vines and later went back and painted all the leaves to match the vines. 


Egg-shape flowers
Again I used the swirl punch for different sizes. Then I shaped each flower with the double ball stylus. Rounding them from the back and then dimple in the front. Then I painted them. The leaves for these were also some punches from the group but were heart shape and cut them in half to use them. To give them dimension so not glued directly to the grass, I added a bit of foam to the back to elevate like a short stem.

Daffodils
To make these I started with a strip of paper. I used my craft knife to cut petals of similar shape and size. Just slightly curved cuts.
The center is a roll of paper that I frayed the edge of the tube.

 The green leaves were from my stash. I purchased them online or at a show. I could have easily hand cut these as they are similar to the other petals. I repainted them to match.

Star-flower/lily (orange and white flowers)
Since I made the egg flowers I decided to stick with making these as well as similar to the illustration as possible. 
They were made similar to the daffodils with different petal shapes.

Dandelions
I thought these were too much and so I took artistic license to not include them. I find them too much of fantasy. Sure that doesn't exactly make sense with the other flowers I made already, but I am just drawing a line and not making these. It's the whole the yellow flowers are too small relative to the leaves thing that bothered me.
Tree
One thing about doing a project based on a picture or drawing is how much of the picture will be done. Sometimes the picture has a depth that would simply be difficult to achieve in the space available. With the trees this was indeed the case.
The trunks are made with dried plant material. I choose the shape best to match the trees I had room to do. The greenery is just the cluster landscape foam sold for trains. I love this stuff. The shape was general. But the choice to flatten the top is because I want this project to fit in a plastic box.
Owl
Before I started this project I told myself that I would find a bead/charm to do the owl. I wasn't particularly interested in making one in clay although it was a possibility if the bead/charm thing didn't work out. Indeed I was able to find a suitable charm and even ones the right size and without any loop to be cut off.
This product is sold for going inside of a clear locket. It is flat on the back, but I was ok with that, rather than creating in clay.
To add feet, I cut a piece from the hole punches.
I cut the tail at the same time and this also gave the charm a place to sit and something more to glue to the top of the pole.

Doll
It took me several weeks to get back to this project because the next phase was the doll. I knew that I wanted to make this using cloth covered wire. I knew I could do it so the time delay wasn't me procrastinating like often happens, but simply real life activities keeping me busy.
To start the doll I used a wire pin template (pins in a block of wood a the wrap points) I made for some previous dolls.
This is the result of the template
Next I shaped the body by squeezing the legs and arms together, then painted the feet as shoes. I also added some tissue paper to the feet to build up the shoes.
The socks were also tissue paper and I painted. The lines are done using a 20/0 liner.The technique is to make sure the brush is wet and roll the brush through the paint to get a fine tip. I also like to use extender which is an acrylic product that extends the drying time but also thins like water but with different properties than water.
To give the body depth, I knew I wanted to add stuffing or something. My something was batting used in a jewelry box. I wrapped the stuffing in the middle and then wrapped with white silk ribbon. I applied glue to the ribbon to keep in place. I didn't use a lot of glue, just enough to hold it in several places. I could have tried to match the color of the ribbon to the finished color, but I figured painting the ribbon would hide some of the glue marks and make it look better. (I was right.)
After completely wrapping the torso, legs and shoulders, I painted the body blue.
I then added tissue paper pants. These were painted as well.
Next was a tissue paper jacket/sweater that was also painted. Here's with the black base coat only.
 I think the tissue paper did well cover the ribbon. I wasn't worried to much about the top.
The white tissue paper was to keep me from getting the yellow edging paint on the blue.
Next was to paint details on the jacket. I used my liner and a 3/0 round to paint with. The dots were made either with a double ball stylus or a needle tool. I repainted anything that was too big when creating the dots. Black dots in the egg flower shapes here were added after the red dots.
To finish up the doll, I decided to use a plastic bead for a head and gave her a face. The hair doesn't show in the illustration so I went with curly blonde. The hair is bunka unraveled, glued on and then trimmed.

Doll hat
For her hat, I used a bead  on a toothpick for shape. I applied thin white glue to a piece of tissue paper and applied to the bead. Boy, waiting for that glue to dry was an inconvenience. Meanwhile I also cut a brim from paper. This was a round piece with a smaller round piece cut out of it. 

I glued the brim on to the tissue paper. Then I decided I needed another layer of the tissue paper on top of both. Once dry, I careful removed from the bead. It did get squished up, but I was able to reshape it. To finish it out with color, I just painted it all over one color then adding several similar colors in lines and swirls to try to mimic the straw pattern.

Hobo sack
Of all the things I thought was going to be a severe challenge, this wasn't it. But it was. At least until I applied glue and paint.
I tried first with cotton cloth. No way. I didn't want to try tissue, because I wanted to tie it.
Next I made a square of silk that I applied a line of glue to avoid fraying. This silk was some from my stash in off white. I've had this silk for many years and purchased the smallest amount I could at the store we got it at. I got several colors but for this type of doll any light color is a good choice. A good source is thrift stores. Silk isn't easy to care for so I think it gets donated a fair amount. The key is of course finding a light color. But I digress.
The silk square gave me the best chance of achieving this. But it was applying thin white glue and then later paint that made it able to be pinched and sort of tied into shape. 
Inside the square is a plastic bead that I had to glue to the middle to fiddle with the silk square.
The paint was a just a base coat. I let this all dry before I applied the little details.The stick is just some grapevine that I cut the right size.
Suitcase
The suitcase is two pieces of strip wood cut to size. I sanded all the edges before gluing them together. Then applied paint. To give it depth, I applied a dirty water wash (thinned black paint) and wiped off as I went. The handle is wire I painted after inserting it into the wood. The label/travel ticker is paper that I glued on and painted.
Finished
Overall this was a really fun project. I will say it was more challenging in some areas than I expected, but nothing I couldn't conquer with trial and error. It also feels really good to have completed this. This year hasn't been a year for minis so far. That's ok, because those other things were important and minis can wait.
ME illustration made in a ME theme cup

ME illustration miniaturized in ME theme cup

ME illustration miniaturized in a ME theme cup

Saturday, January 31, 2015

People in Miniature

So I was thinking about miniature people or characters recently.  I finished up my Mother Goose project that I used a variety of people/characters in. 

When I started doing miniatures – as more than a dollhouse as a child, I didn't much care for people in my scenes.  They seems very staid or too dollhousey.  Yes, that is a word – it just means something is more for play than what I do.  Although I do 'play' with my miniatures - once I am satisfied with how they are laid out, I glue stuff down.  Mostly because my projects are small enough to hold in the hand and things tend fall over when picked up.  Once you glue it down, that stops the 'play'. 
Another way to think of dollhousey is that the items are clunky or not in scale with each other.  I know that I used to make that sort of stuff, so this is not meant to slam anyone.
When it comes to the doll in a scene I guess I used to think that it always looked like a doll.  It was posed and didn't look real like sometimes the scene itself could be.  Granted the dolls I saw were typically not well done to the point you had to look twice to make sure it was just a doll. 
I don’t recall seeing many 'characters'- people that are not meant to look like a real person. At least not the stuff I was exposed to.  I am sure the fantasy/whimsy stuff was out there.  I just didn't see much of it.  Even what I think I did see, I recall as being ceramic animals dressed as people.  I even have a rabbit doll like that I used.
Now days, I do like people in my scenes.  Visit my pictures and other blog articles and you will see this more and more.  Not every scene of course, but more often. 
When it comes to making them – well we have a plethora of media available to do that. My dolls/people/characters come from plastic figures (train figures, nativity figures), resin (rabbits, penguins), clay (hand made by me, or purchased), wire, paper and cloth (I offered kits of these before) and I think I even have some ceramic people but haven’t used them anywhere yet.
Out in the miniature world, dolls I see have come a long way.  The ceramic playthings are still out there and they have their purpose.  There are doll artists who make dolls so real you would think they are if you stare at them long enough.  I have yet to plunk down the price they ask for them.  I think they are well worth the price, but just not for me.  Also those tend to be in 1:12 scale which I don’t do much anymore.

I love to purchase the ones in 1:48 scale that are made in polymer clay.  These actually fall into what I call 'characters' although more people in body shape.  It is their charm that has won me over.  They so darn cute. 

When it comes to peopleing my scenes, I am using what I can to do that.  In my Mother Goose project, I did use a variety of people.  Variety as in the types of media and shapes.  In other projects, I would lean towards one type (media)  and one style (people vs character) in the project as a whole.  So no 'realistic' with 'whimsical' type figures.  
The reason the MG project was different was that I had so many characters I wanted, that I used what I had available.  That was sort of a theme for that MG – use what I have.  For all the simpleness of each section, it was the overall project that consumed the time.  That being the case, it was indeed ‘use what was available’ as I didn't want to make every character by hand. 
Several of the ones I used for the MG project were plastic or resin and required that I re-work them.  I am really enjoying doing that now.  It is fun to have a resin or plastic figure that works with no tweaks, tweaks of paint, but fun all the more to play around with the dremel tool and making it into something else.  This is especially true if I have more than one of the same character or an odd one that doesn't match up with anyone else.  
Here are some examples of the variety I used in my MG project with before and after:
These figures didn't have bases.  Just a paint job improves this one, but I also took off the spy glass and the bucket with sailboat.
Wire doll bodies
 Dressed bodies
Plastic nativity figures I have started modifying
After painting and modifying to fit the tub

Lessons here: be on the lookout for people including ones that can be modified.  Secondly, don’t be afraid of the dremel.  Third, be willing to paint over that mess that the factory did.  Lastly, adding people/characters to a scene may be just what it needed.