Art in Miniature
In 2013, the theme for the MicroMini yahoo group online convention was announced. The first thing that came to mind was my semester spent at Appalachian Center for Crafts (ACC). At ACC they covered 5 different art media: Clay, Glass, Wood, Metal and Fiber. I took an intro class in both Fiber and in Glass. Although I really enjoyed my time there, I did decide that it wasn't for me so I didn't continue. In hindsight, I wish I had pursued a degree in Fine Arts instead, but I digress.For the convention I decided to offer a workshop, so I came up with this. I did have to narrow the selection to four media - however I switched to painting as one instead of wood or metal. I narrowed the selection only due to the size of the cover I wanted to include. I really prefer having a cover anyway.
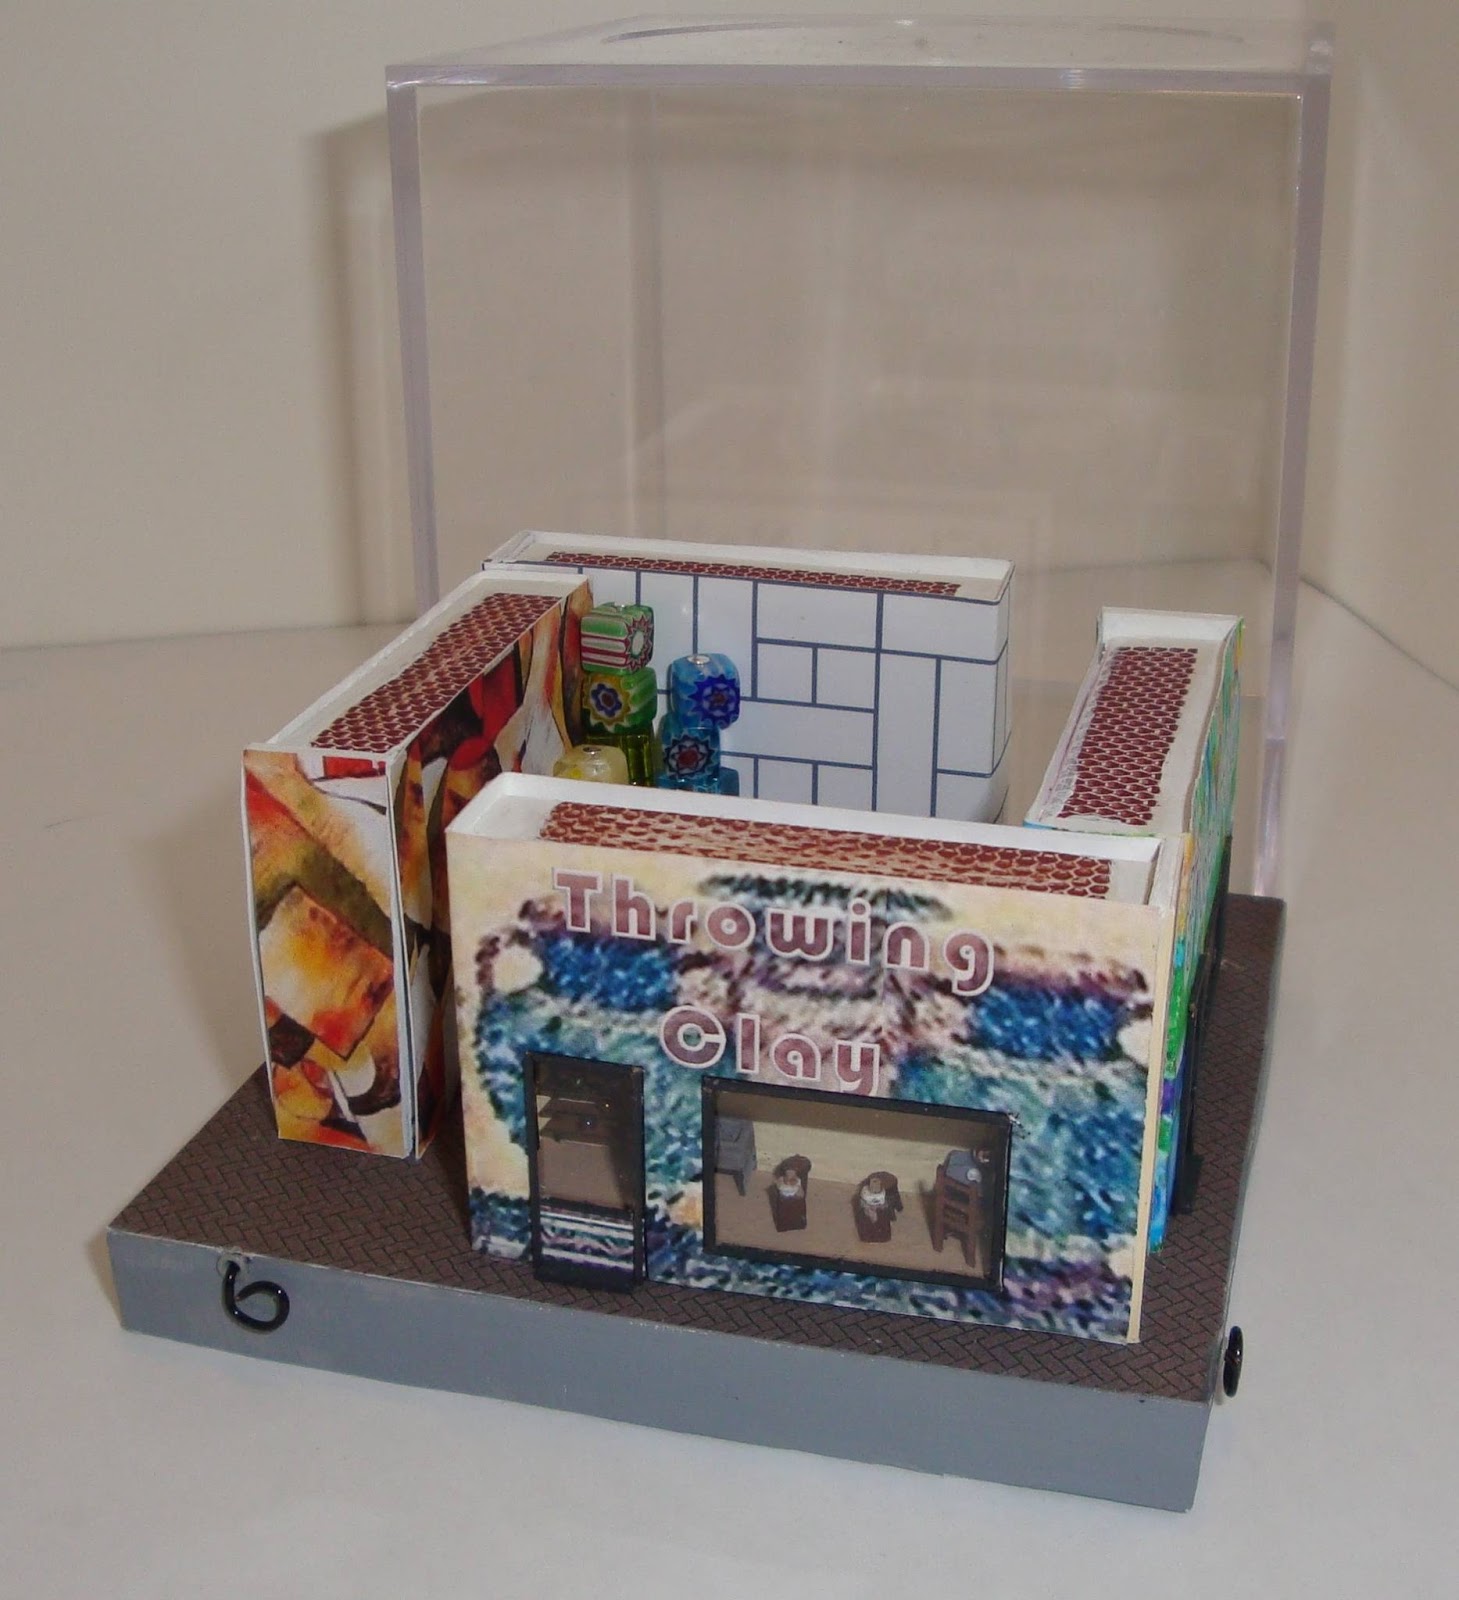
Choosing matchboxes to house this is almost like second nature to me for micro mini or 1:144 scale miniatures. They capture my love of using unusual containers to make things in for one. For another they just have a good size for a simple building. They may not be very deep but that also works if you don't want to get too in-depth into a subject. Oh and they are also very cheap to use and very easy to work with.
Here is the result of that creation:
Sliders - oh the decisions
I don't know why I was obsessed with a means to open the drawers without touching them. My last endeavor with matchboxes created a really simple extra end that made it super easy to open them. See that project talked about on my blog here or just in photos here. I discussed this with my hubby as I really wanted a mechanism that allowed me to turn a knob and open all four of them at once. Since I had already decided that I was going to do this as a workshop it was critical that it not be too expensive to do or to difficult to do. Doing it for myself, I could have designed something I was happy with. But I had decided it would be a workshop so simple won out. What I ended up with was a single wire and groove for the wire for each studio. Also each wire comes out an eyelet. Those made a really nice cover for the hole.Here it is with all the drawers out and you can see the sliders:

Filling up the Interiors
I work full-time and so my mini-time is precious. I knew I could develop my own kits to go inside, but to make things easier on myself, I contacted Susan K. of sdk minis. I asked if she would be willing to work with me on providing items to go in my studios. I had already selected several of her kits to purchase but there were a few others that we worked together to come up with what I wanted. She also had several new kits she had worked on as well that were right in line with my ideas.I ordered a number of kits and then it was time to put them together. I haven't made that many 1:144 scale kits at once. I might not have done them all if I hadn't wanted them all finished to show with my workshop. My workshop was just the studios and artwork to go in them - leaving the actual furnishings to sdk minis kits.
For the student artwork I used a lot of beads and other bits. I printed a few things for the walls. I collected images from the internet and resized them down to suit what I wanted. The most fun was making the Glass artwork. I will cover that in another blog post. I will say that I used plastic to make my glass. Both the window and door glass and the glass artwork were made from plastic.
The Courtyard
In deciding that this was four studios and they were somehow connected, I designed a center courtyard that would be surrounded by the studios. The matchboxes could then all be seen from the fronts to the outside. Inside the courtyard I envisioned a place for the students to sit and also for people to visit and see the artwork on display at that time. This type of artwork can be quite large so I allowed my choice of materials for these to be larger than what went inside. Although when it comes to artwork, artists seem to love doing larger than life sculptures.One idea that I had and clung to longer than I should have was to have beads on the slider wires. The idea was to have the beads as sculptures at the end of a matchbox. These had to be such that the beads were sturdy as well as the wires. While I worked on this, I also clung to the wire I had first decided on. I choose it simply because I knew it was sturdy - not easily bent, but it was thin. Unfortunately that thinness was really what wasn't working. I discarded the idea of the beads on the slider wires as sculpture long before I tried another type of wire. It was only someone else's suggestion (at my request for suggestions) to try something else that didn't work to pursue the other wire options in my stash. I share this with you so that maybe you won't cling to an idea that it has to be this when it doesn't appear to be working. Also it is a reminder to myself to be open to any and all options.
Here is the results of the courtyard

One of these days I think I would like to create a companion piece that can live next to this one. It might have a shop for the students to sell their artwork or maybe a metal working studio....
to see more photos of this project - pop over to my picture trail and view its album
and stay tuned for the how to on making the glass art work - coming soon to this blog
1 comment:
That is a great way to use matchboxes =) Looks really great!! Hannah
Post a Comment