
NAME day arrived and I wasn't ready. I had been finishing up my RA Trunk and I wanted to get it done before I moved on. So I glued everything down, set aside to dry, then I had to clear off my desk a bit.
Finally, I started the hutch kit. Meanwhile I was on chat with the QC online group. But found it difficult to focus on both, so I soon was more involved in my hutch.
I had ordered a 1" scale hutch after seeing some of the proto-types that others had done. One in particular was shown at NAME convention in July with a ME theme and it had 1/4" scale in it. Oh boy did that spark an interest for me. I have some ME swaps just itching to be used. This would be just the thing maybe to get them in a project instead of languishing in the ME theme swap box.
In deciding what color I wanted to paint it I went between red, yellow and black. I began building this kit and I thought and thought about this theme.
First I was supposed to put the base together, but darnit some of the pieces don't fit right. Mmm... what are my options? 1. I could stop and just not finish this. 2. I could cut off the excess or 3. I could go with it and just hide it. I went with #3 because I knew the base was going to get baseboard trim. I figured I could hide it and I did.
Next part was building the doors and at first I was laying them out wrong and I thought oh no not again, but turns out was my mistake and had them laid out wrong. Pieces fit together just fine. Although I did have to sand a bit at one side to even out - square up the frame. But nothing some sandpaper won't fix.
Got the base together and decided on black as my main color. I even determined I wanted to use white inside the upper portion.
I assembled the back and painted it white, then added the shelves. At this point I choose to devaite from the instructions and put my shelves 2" apart (that's 8 feet for 1/4" scale). this left one set of shelves as leftover.
Finished building the hutch and got to the crown molding. Oh really, I can't believe my bad luck with this kit.
The crown molding had one piece cut wrong. Not me laying it out wrong it was cut wrong and no extra in the kit. %*&#$!
I looked in my supplies and yes I have a stick of crown molding. not the same so I had to cut the three pieces. Now if I hadn't had the extra available, I would have been really unhappy so if there is a lesson to learn here is that it is doesn't hurt to save those scraps or have a extra on hand for whatever.
But I did get it all put together and painted. That was Saturday night and even went shopping with DH so he could work on my car. yeah!
Then I decided I wanted to see what ME graphics I had to use to decorate this. I purchased some notepads years back and I looked at them and bingo this one is it.

So Sunday morning I go to my computer and I scan this notepad (and others for another time). I had already tested the lovely lace at the top on my hutch and that was going to work out swell.
I used the notepad to make parts so I could print what I needed. I did resize and make a longer piece of lace in MS Word, by copying and pasting on top of antoher to block off the end. I just aligned the top pic in word to line up with the first pic. Then I cropped the sides and copied a bunch of those to print out.
Then I cut them out and glued them on the hutch.
As I was building the base, I decided to paint the inset of the doors white to highlight the grooved wood. As I was looking at that notepad, I thought ME style and decided that would include something on these doors and the middle of the notepad had that darling girl watering her flowers. So I cut that out and glued it on the doors. Yes, it was tedious to cut out these things, but for miniatures it was worth it. I used some small scissors to do this. I find it is important the tips work so beware. Some tips don't and aren't going to work for this type of triming.
 close up of the doors
Oh no, I can't see the top shelf items with the lace hanging down. Ok, what to do? For me that meant taking the top part of the hutch apart. I took off the sides first. Then I carefully worked on the shelves. I broke one of them so I was thankful for the extra I had. But if I hadn't I might could have glued the broken shelf back together and used it. But I also had on hand some wood I could cut that would have worked. (Save those scraps!)
I had to sand and scrape to remove the excess glue and paint layer where the shelf was originally but I got it done and then glued the shelves in their new place. the first shelf was at 1 3/4" (7 feet) and I test fit the swaps I had already pulled and it worked so I put the hutch back together.
 here's the full view
The drawers were kinda of plain and after glueing on the side trim of the upper, I had some leftovers and I was able to use the pink check with flowers and make some handles.

I did add a second layer to the handle itself, but didn't really matter.
The trim around the doors was actually same check as the flooring that I had leftover from another project, but I could have made the check on my computer.
 this shows the flooring I added
One of things I my swaps boxes was a resin sofa I picked up at a hobby store years ago. The colors went with the theme I decided to use. But it is going to need some paint touch up. And the longer I looked at it, the more I decided it was too high and crooked.
Out comes my trusty dremel. I carefully measured from the sofa cushions down to where I wanted the bottom to be and marked with a pencil. I drew this line all the way around. Then using my dremel I started sanding/drilling it down. I worked the edges close to the line and still had a hump in the middle so my answer to that was to remove some extra in the middle and then sand/file it flat.
This pic shows what the bottom looked like after the dremel tool and the file was used.

I was not concerned with evenness inside the area so this bit worked for me. the metal file is what helped to make it flat.
Now the painting of the sofa.
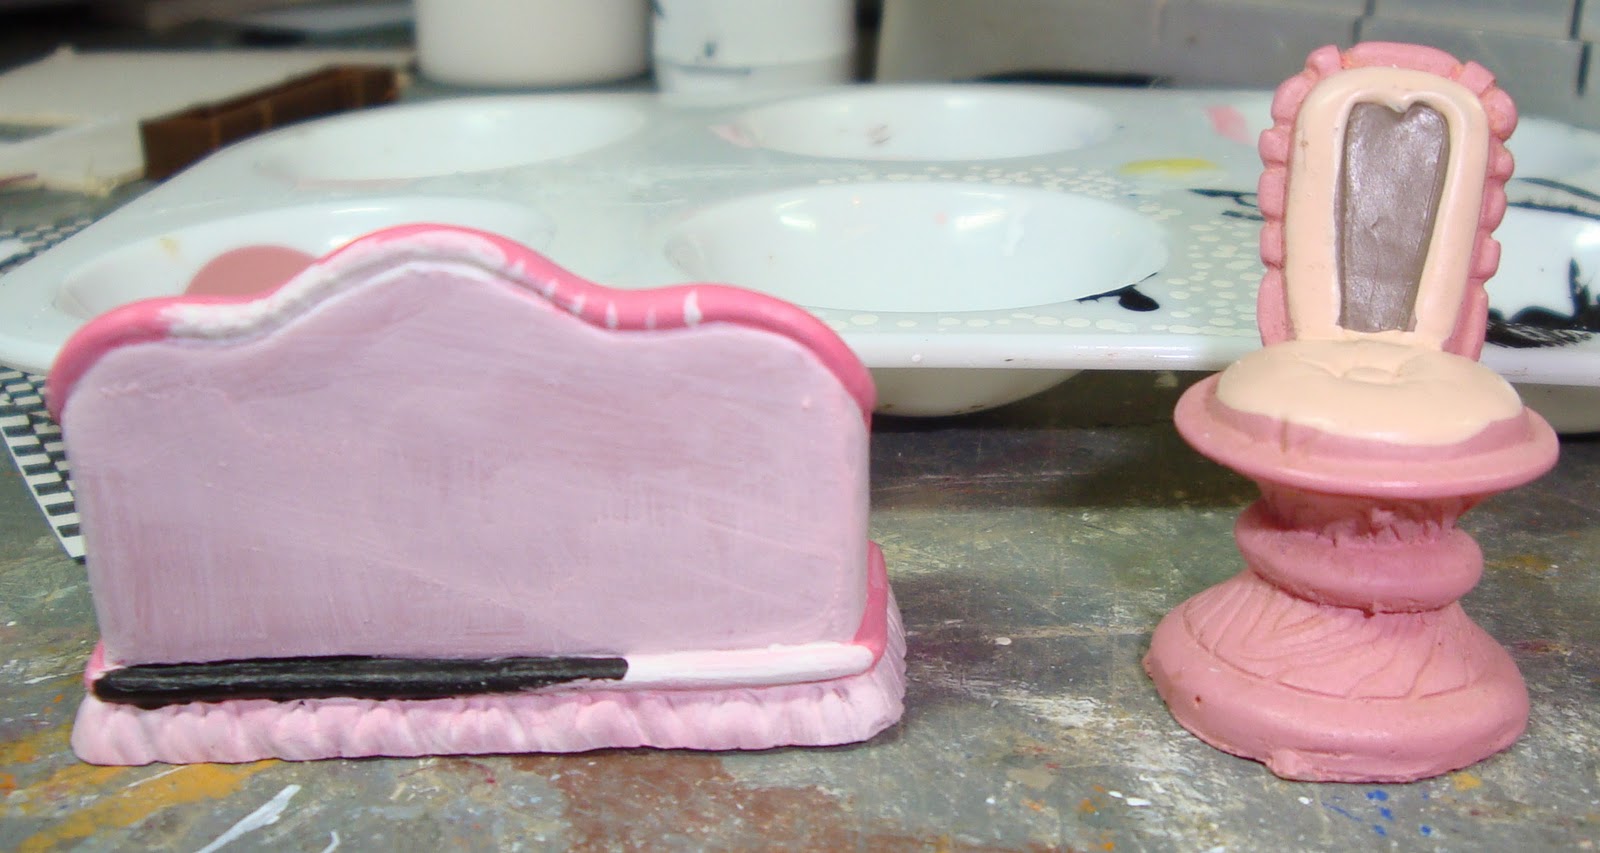
The chair to the right shows the colors this sofa had before. The pic shows in process some various painting designs I was experimenting with. I first painted it with dots, then decided had to paint the trim and ended up mixing some light pink. I tried some different pink on the trim and it was too much. I thought I might try to make checks but too much trouble. So then I just stared at this sofa thinking what would this wide trim piece be in real life. It was far too big to be piping which is what the pink might have worked with. Then I decided it might be the wood of the sofa and be wood color but since I was going with my black/white/pink/green theme, I decided it would look best black.
I still liked the dots I had done so I put those back after covering them over with the light pink.
I used the smallest end of my double ball stylus to dip in white paint and then on my paint pallete to remove excess and then onto the piece to get the uniform dots.


1 comment:
Love your little sofa! The hutch looks so pretty with all of the detail you've added too. The roses are so nice! Thanks for sharing how you did this. :D
Post a Comment